

Down-Payment-Documents
From first question to final approval — we've got you
Down Payment Documents: What You Need & How To Get Them
A Few Important Notes
- Nothing mobile is accepted. Every document needs to come from a desktop or laptop browser, not a banking app.
- If money was transferred into an account before landing in your down payment account, we'll need a 90 day history from that originating account too.
- Any deposit over $1,000 that isn't your regular income will need a short explanation. Think gifts, transfers, or the sale of something.
- If your down payment is coming from more than one account, we need this full document set for each one.
Why This Matters
Lenders need to see two things about your down payment: where it came from, and that it's been sitting in your account long enough that it isn't a last minute loan. That's why we ask for a full 90 day history on every account contributing to your down payment, not just a recent balance.
What You May Be Asked For
- Three full months of official bank statements.
- A transaction history covering the first of the current month through to the current date, since your statements only cover completed calendar months.
- A Profile or Account Summary screenshot showing your name and account number, if your transaction history doesn't already show that information.
- Investment account statements (RRSPs, TFSAs, and similar).
What A Bank Statement Should Look Like
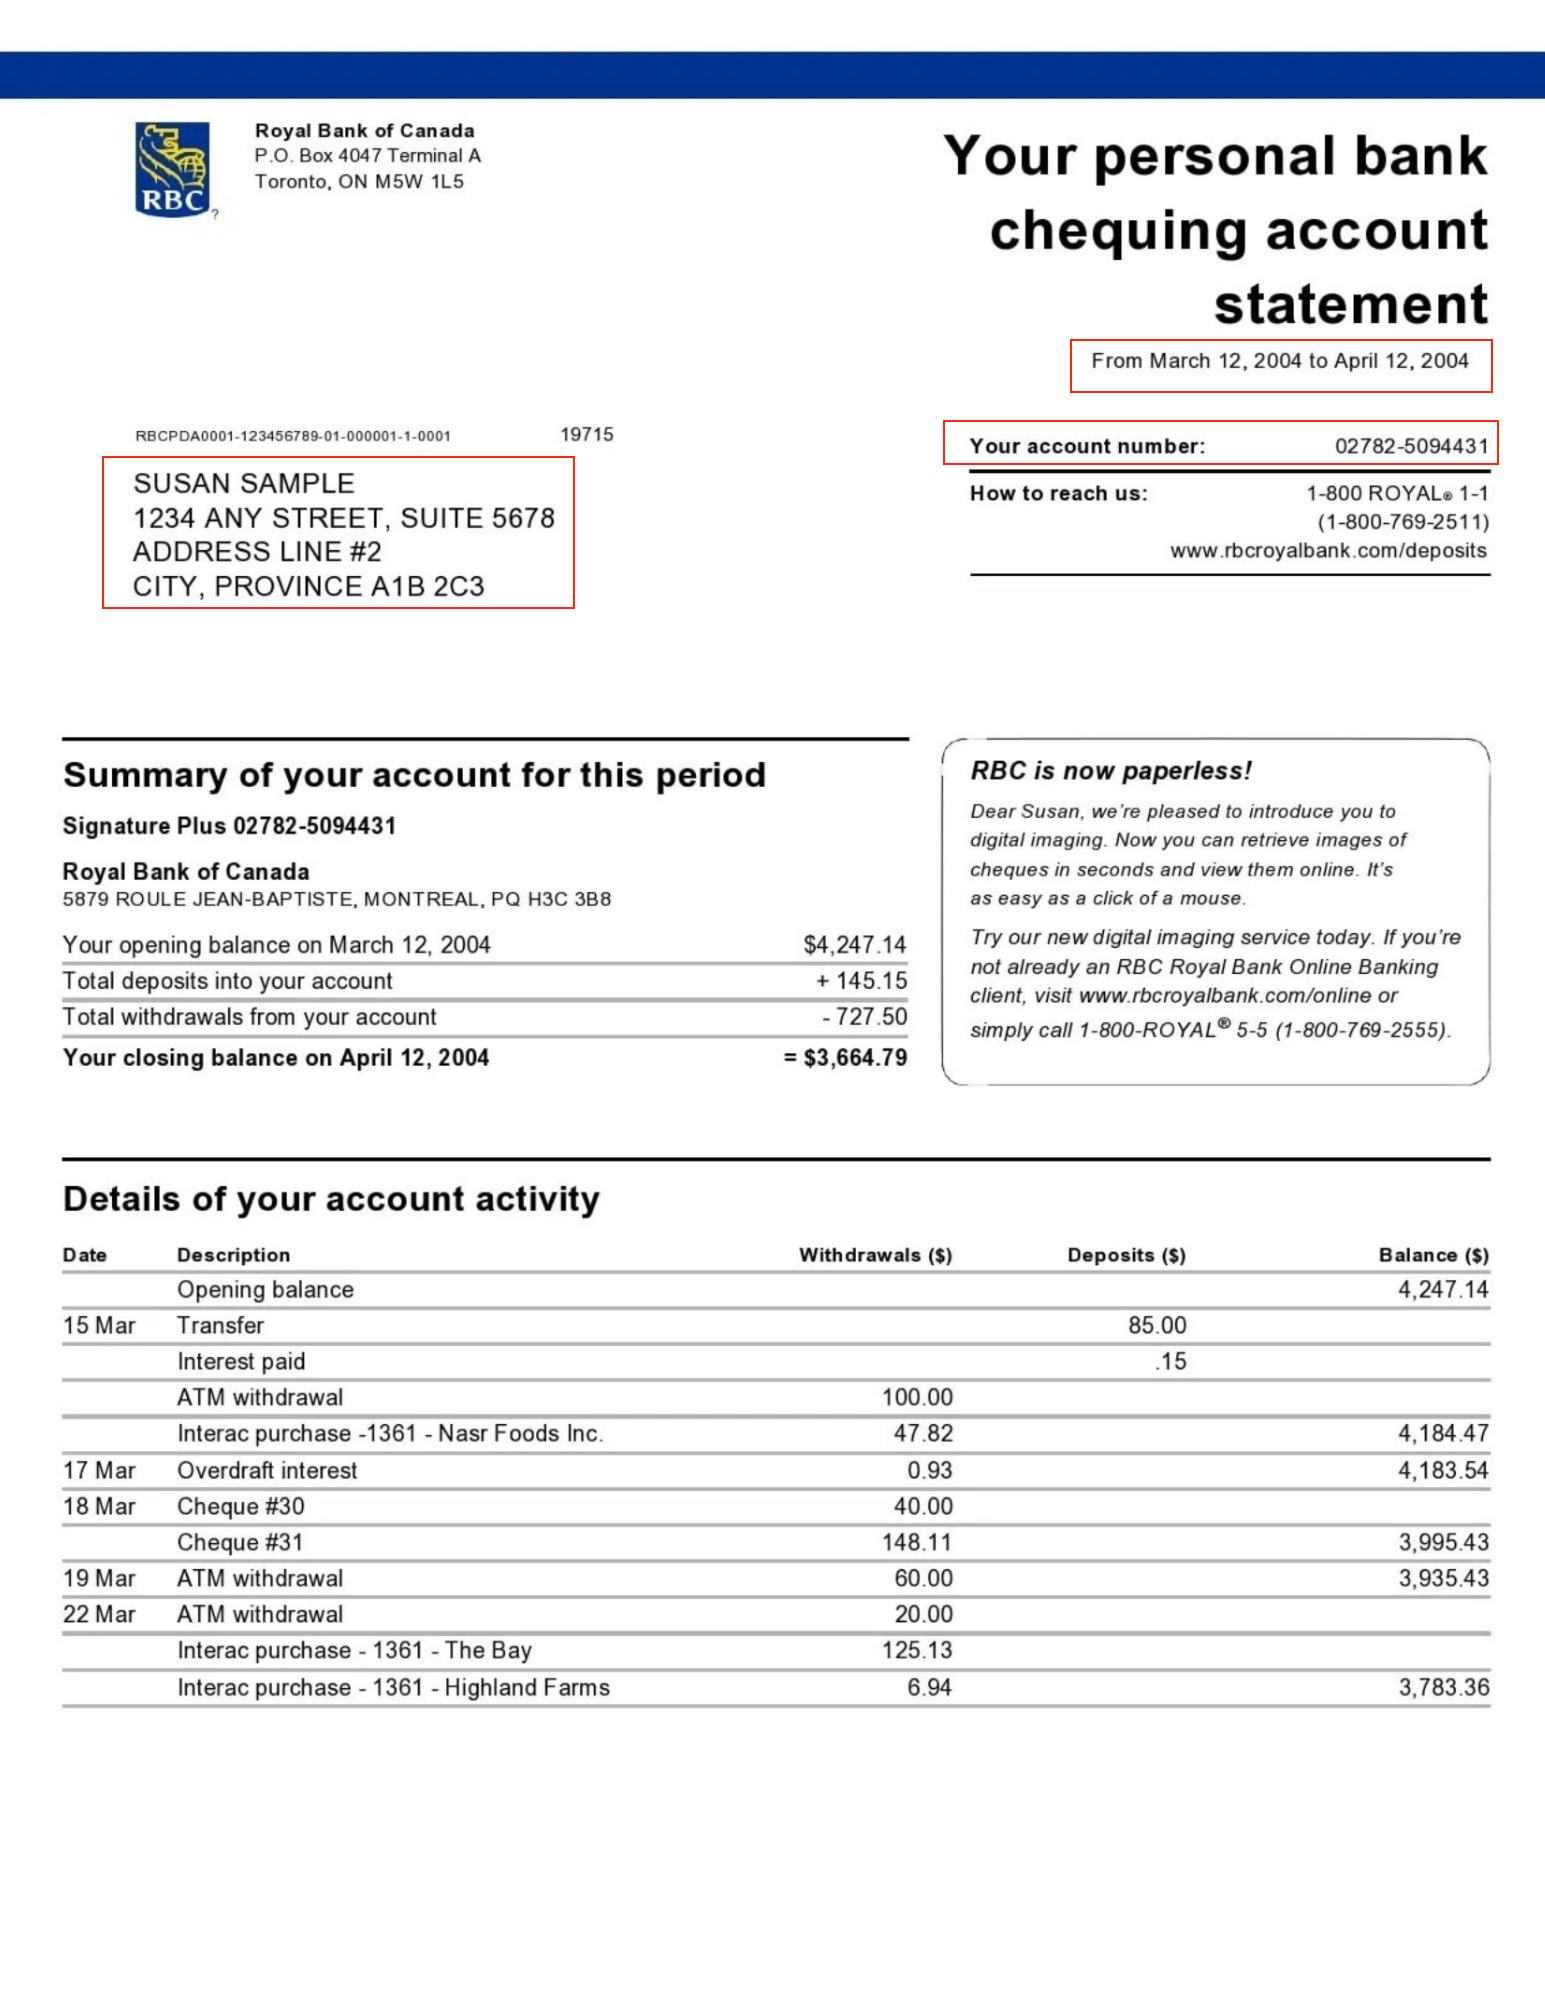
Your monthly statement is the official document your bank generates automatically. It should show your name, your account number, the full statement period, and your balance at the start and end of that period. This is what covers your three full months of history.
What A Transaction History Printout Should Look Like
.png)
Since your bank statement only goes up to the end of last month, we need something to cover the gap between then and today. Log in to your online banking, set a custom date range from the first of this month to today, and save it as a PDF. This shows the lender there haven't been any surprise deposits or withdrawals since your last statement.
What An Account Summary or Profile Screenshot Should Look Like

The purpose of the account summary page is to give lenders an accurate balance as of today's date. Please take a full screen screenshot from a desktop computer or laptop, making sure the date and time are visible in your computer's menu bar.
What An Investment Account Statement Should Look Like
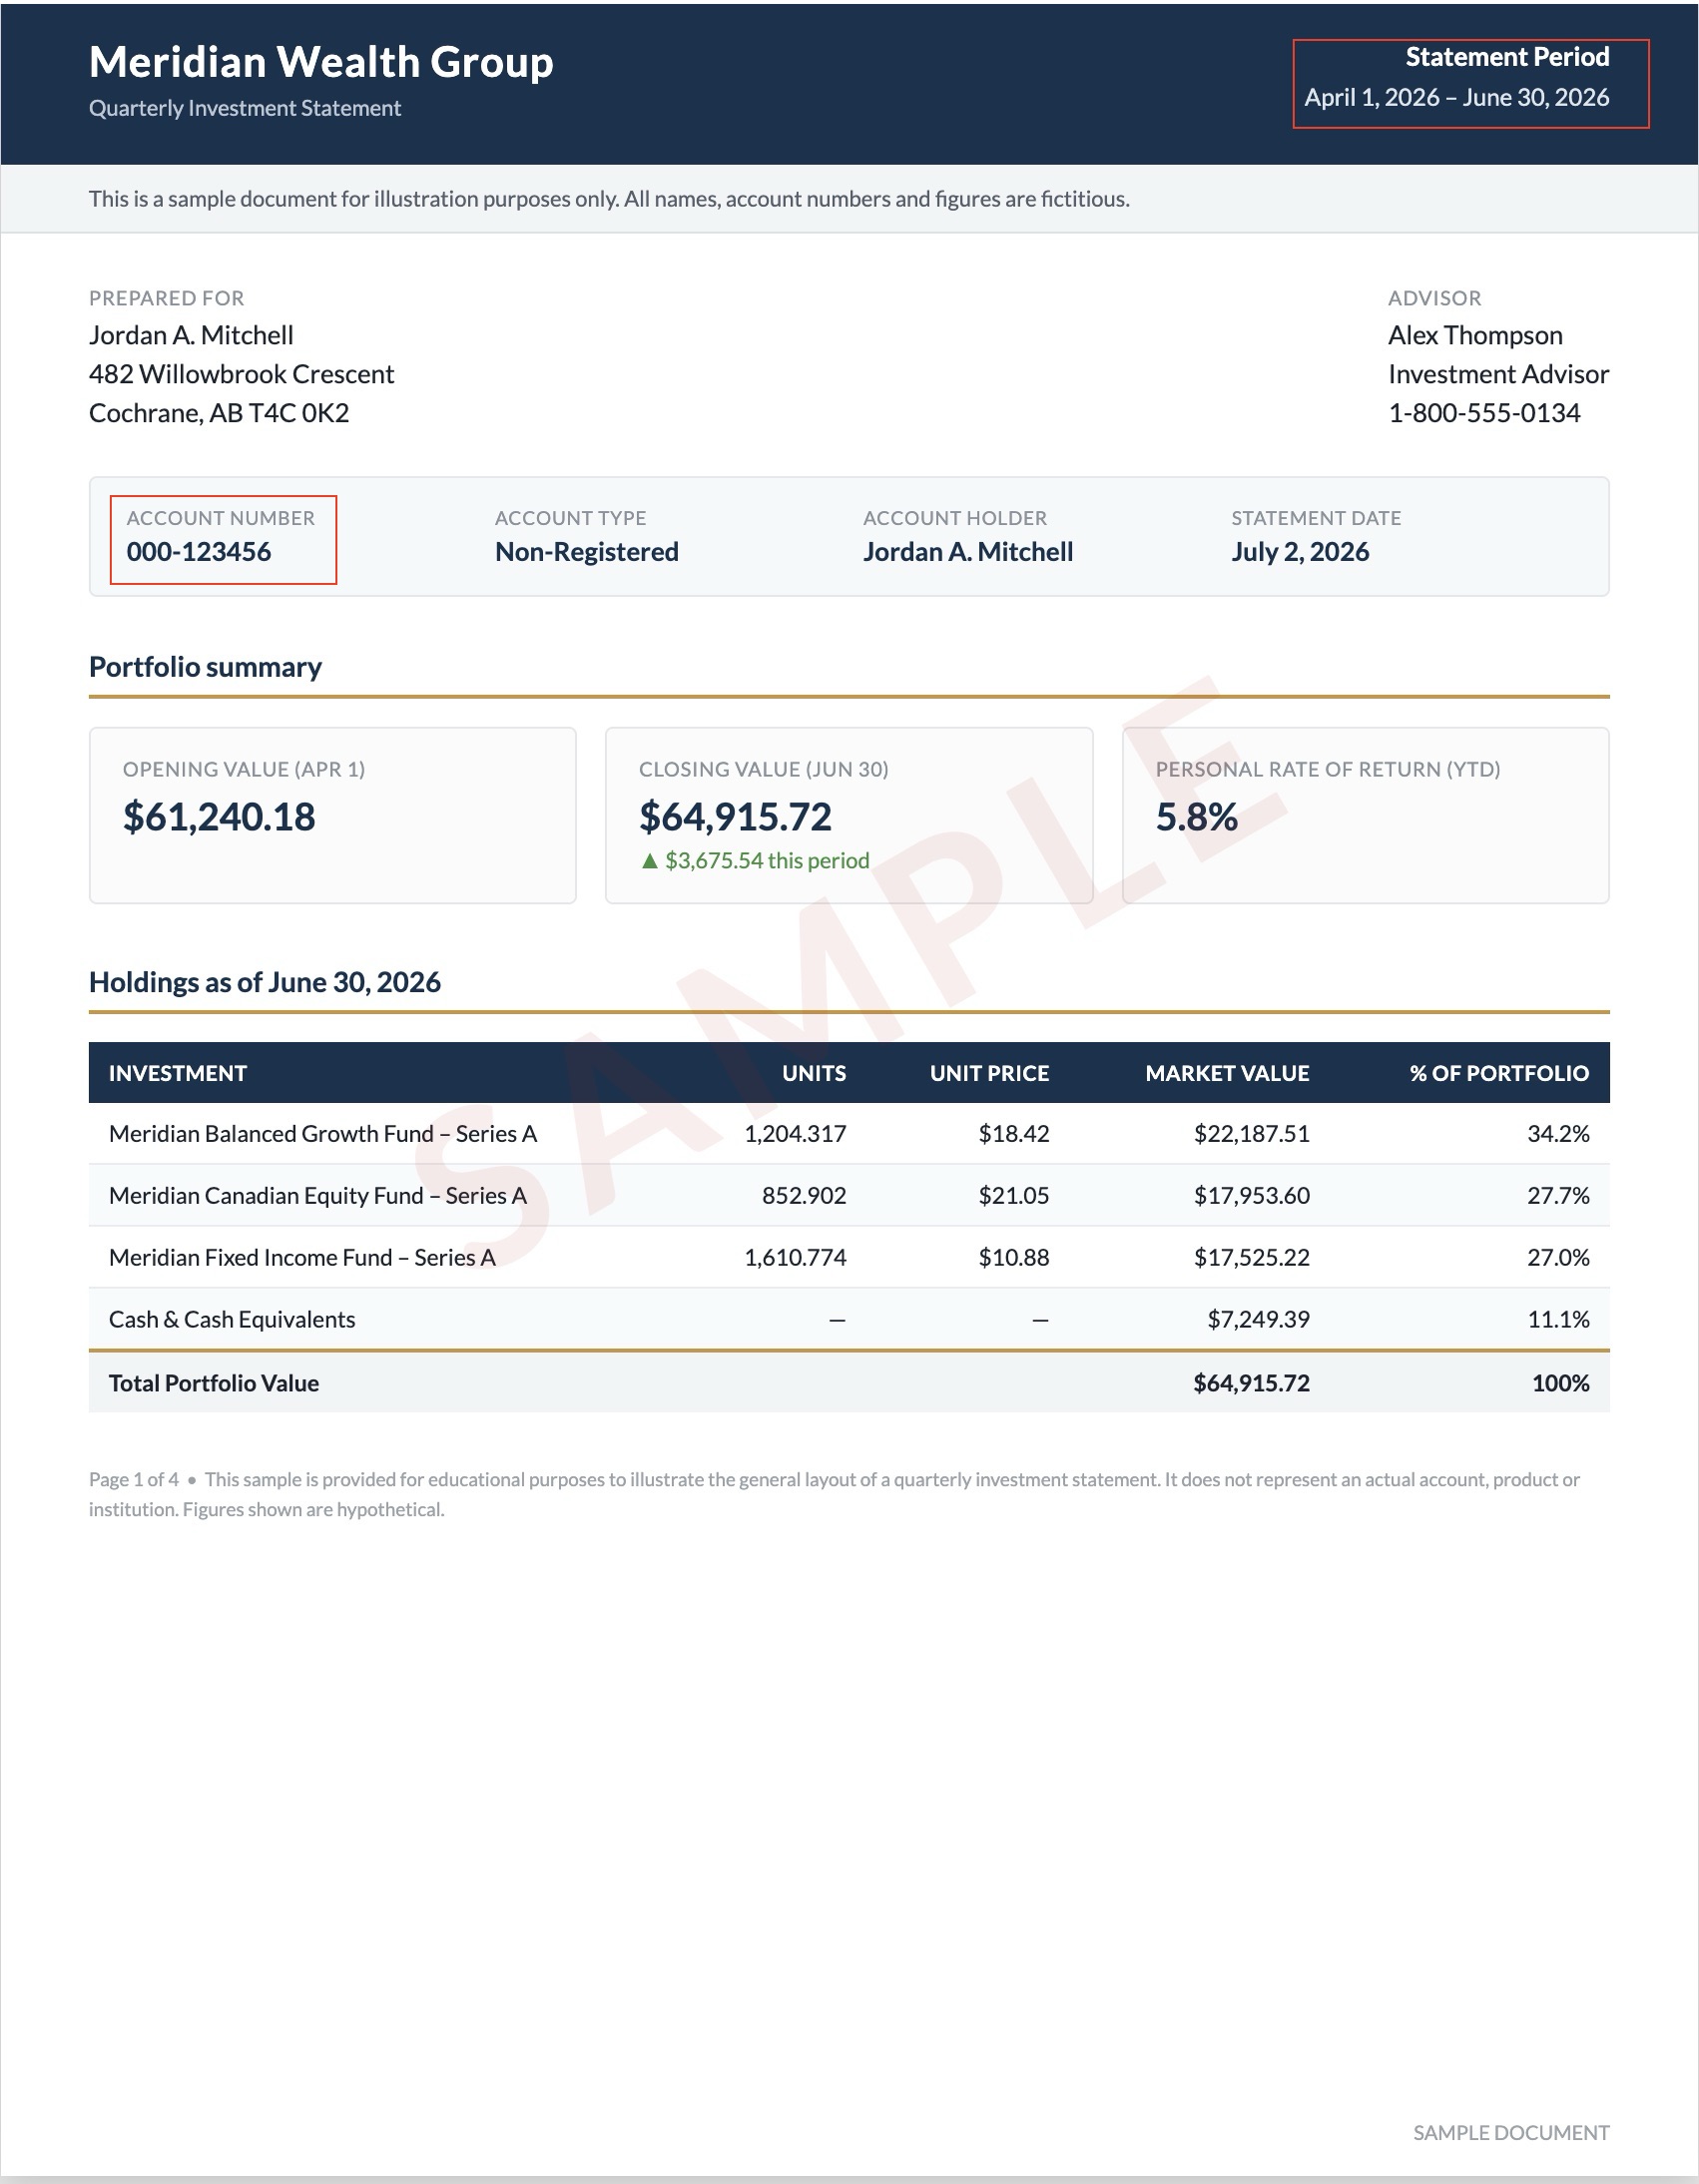
If part of your down payment is coming from an RRSP, TFSA, or similar account, we need your most recent quarterly statement along with a Profile or Account Summary screenshot showing the current balance.
How To Get These Documents, Step By Step
- Log in to your online banking from a desktop or laptop. Lenders do not accept mobile app screenshots for any of these documents, so this step matters.
- Download or save your last three monthly statements as PDFs.
- Go to your transaction history, set a custom date range from the 1st of this month to today, and save it as a PDF.
- If your bank won't let you filter that date range, take a screenshot instead, making sure the account number and every transaction from the 1st to today are visible.
- If your transaction history doesn't show your name or account number, add a screenshot of your Profile or Account Summary page.
Where To Find This In Your Online Banking
| Bank | Monthly Statements | Transaction History |
|---|---|---|
| RBC | My Accounts → Statements/Docs | My Accounts → Account Details → filter by date → print or save as PDF |
| TD | Accounts → View eStatements | Accounts → Transactions → select date range → export or print |
| Scotiabank | Documents → eStatements | Accounts → Activity → filter dates → print or save |
| BMO | Accounts → eStatements | Accounts → Transactions → custom date range → print or save |
| CIBC | Accounts → eStatements | Accounts → Transactions → custom range → export or print |
| ATB | Accounts → eStatements | Accounts → Activity → custom dates → print or export |
How To Take A Screenshot
Mac: Command + Shift + 3 for the entire screen, or Command + Shift + 4 to select an area.
PC: Windows key + PrtScn for the entire screen, or use the Snipping Tool to select an area.
The faster these come in, the faster your application keeps moving. If anything above is unclear, send me a message, I'm here to walk through it with you.
Questions? Reach out anytime. Brandon Forler, Mortgage Broker, Unlock Your Home Mortgages Inc. UnlockYourHome.ca
